Recently Duo Security made available Trusted Endpoints to all Editions. Duo Essentials, previously known as Duo MFA edition, has the following features.
- MFA (Flexible options including FIDO2 and Verified Duo Push)
- Single Sign-On
- Passwordless Authentication (Using FIDO2 or Duo Mobile)
- Trusted Endpoints Verification
- Device Visibility
- Authorized Networks
- Unlimited Application Integrations
- User Group Policies
Trusted Endpoints Verification & User Group Policies are the key features that stand out in Duo Essentials Edition.
A series of blogs will follow to build a lab to guide security folks on these features and helps to adapt these features to enhance their security posture.
Duo Security offers various ways to establish trust for an endpoint accessing a Duo Protected browser-based Application. Some of the widely used methods are as follows.
- Active Directory Domain Services
- MDM managed devices
- Generic Integrations
- Manual Integrations
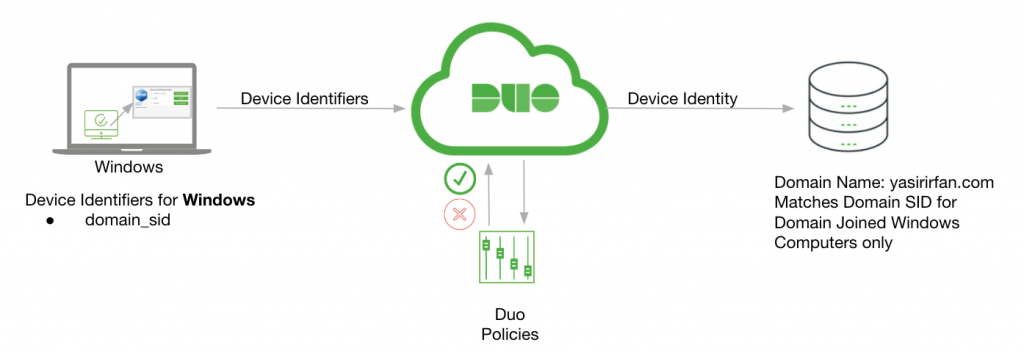
This article will integrate Microsoft Active Directory with Duo Health Integration. Below topology is used for this integration.
Figure 1: Topology used for this integration

| Table 1: ADDS Intgrations Details | |
| Domain Controller | yasirirfan.com |
| User Accounts | [email protected], [email protected] |
| AD Group | YI-DS |
| SID Used | S-1-5-21–XXXXXXXXX-XXXXXXXXXX |
| Application Protected | Cisco ISE SAML Integration for Admin Access |
- In the Duo Admin Panel, click Trusted Endpoints from the menu on the left. When ready, scroll down and click on the blue Get Started button.

- To the right of Active Directory Domain Services, select Windows from the dropdown and then click Add.

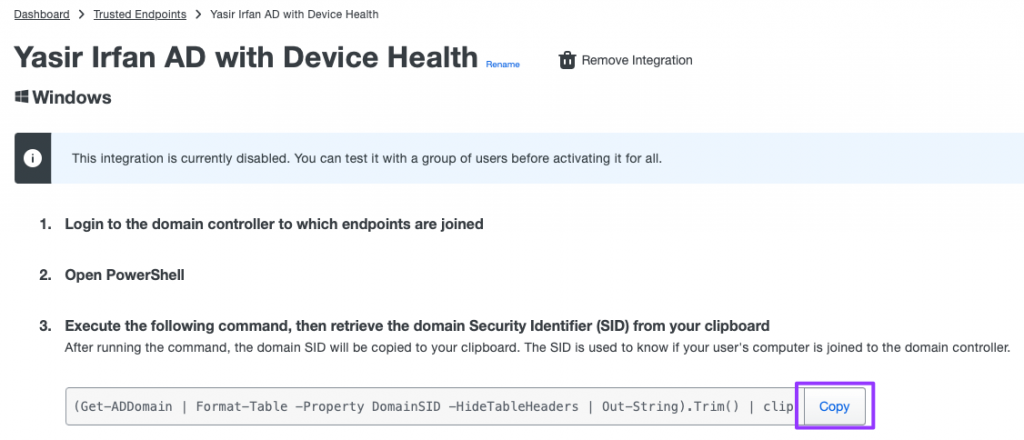
- Copy the Powershell command to retrieve the domain security ID (SID) by clicking the Copy button.

- Log in to the Windows domain controller and run the Powershell.

- In the Powershell window administrator prompt>, paste this cmdlet string from step 3 above after the prompt and press enter. If it didn’t copy successfully, you can cut-n-paste the following cmdlet string manually.
(Get-ADDomain | Format-Table -Property DomainSID -HideTableHeaders | Out-String).Trim() | clip

- This command obtains your AD domain’s security identifier(SID) value and copies it to your clipboard automatically.
- Paste (Ctrl-V) the domain SID you copied in Step 6. It should look similar in format to S-1-5-21-4285593764-xxxxxxxxxx-xxxxxxxxxx. Click Save when complete.

- Scroll down to the Change Integration Status section. Slide the button to the right for Integration is active. Select the Activate for all radial button. Click Save.

- Scroll to the top. You should receive a confirmation message that Active Directory with Device Health integration was successfully activated.

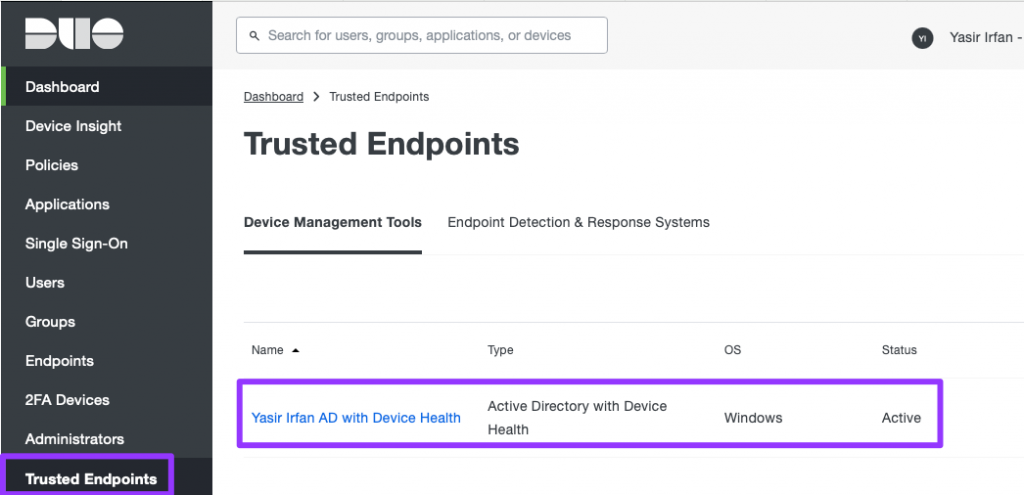
- In the Duo Admin Panel. From the menu on the left, select Trusted Endpoints. You should see the Active Directory with Device Health status as Active.

This article has set a foundation for configuring Trusted Endpoints for Active Directory Domain Services using Duo Device Health. In an upcoming article, we will focus on integrating a SAML-supported Web application with Duo SSO.

great