
Restoring the Cisco ASA Firewall to default settings is quite easier, there are two ways to do this. In this post, lets see how we can do this using the Cisco IOS Command
config factory-default
Step 1
Connect the console cable to the console port of an ASA Firewall and to the serial port of your laptop or desktop
Step 2
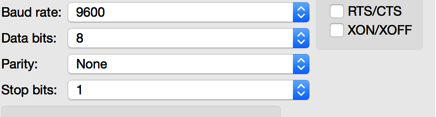
Connect to the Cisco ASA Firewall using your favourite terminal client ( I am using Secure CRT ) with the following serial setting
| Baud rate | 9600 |
| Data Bit | 8 |
| Parity | None |
| Stop bits | 1 |
Step 3
After login to Cisco ASA Firewall through the console port enter to enable mode

Step 4
Enter to Config mode and enter the following Cisco IOS command and press enter
config factory-default
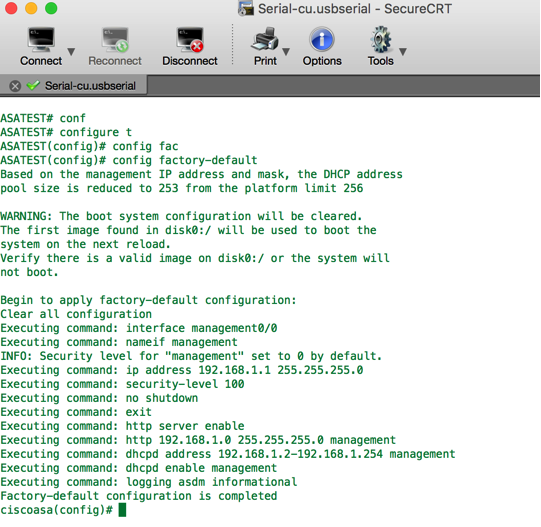
You could see the Cisco ASA Firewall is configured to the factory default setting, reload the Cisco ASA Firewall with an IOS command
reload save-config noconfirm
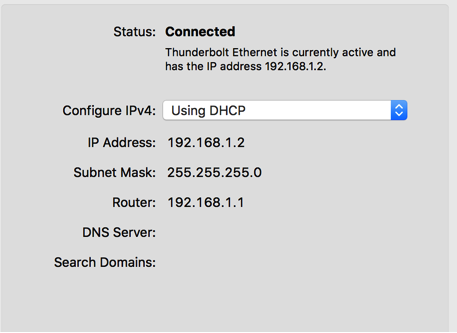
By following the above steps one can reset the Cisco ASA Firewall to factory default settings, now you are free to access the firewall using either a console port or ASDM using the default IP address of 192.168.1.1, provided that you are connected to the Cisco ASA firewall on an ethernet or management port, this depends on the model please do check the datasheet of your firewall, in my case its a Cisco 5540 Firewall and the IP address is assigned to the management interface and the DHCP pool is also configured.

The moment I connect my laptop to the management port of the Cisco ASA Firewall I will get an IP address from the DHCP server of the ASA Firewall as shown below
I could log in to Cisco ASA Firewall using my browser and I can manage the Cisco ASA Firewall by downloading the ASDM as shown below
