
After passing the F5 201 – TMOS Administration Exam, some of the professional friends were keen to know how to build an F5 practice lab on their personnel machines.
In this post we will walk through how to build a virtual lab for F5 201 – TMOS Administration Exam on macOS Sierra step-by-step.
We will be using the following topology to built an F5 Virtual lab so that one can practice for their 201 – TMOS Administration Exam. Before starting please ensure VMware Fusion is installed on macOS Sierra
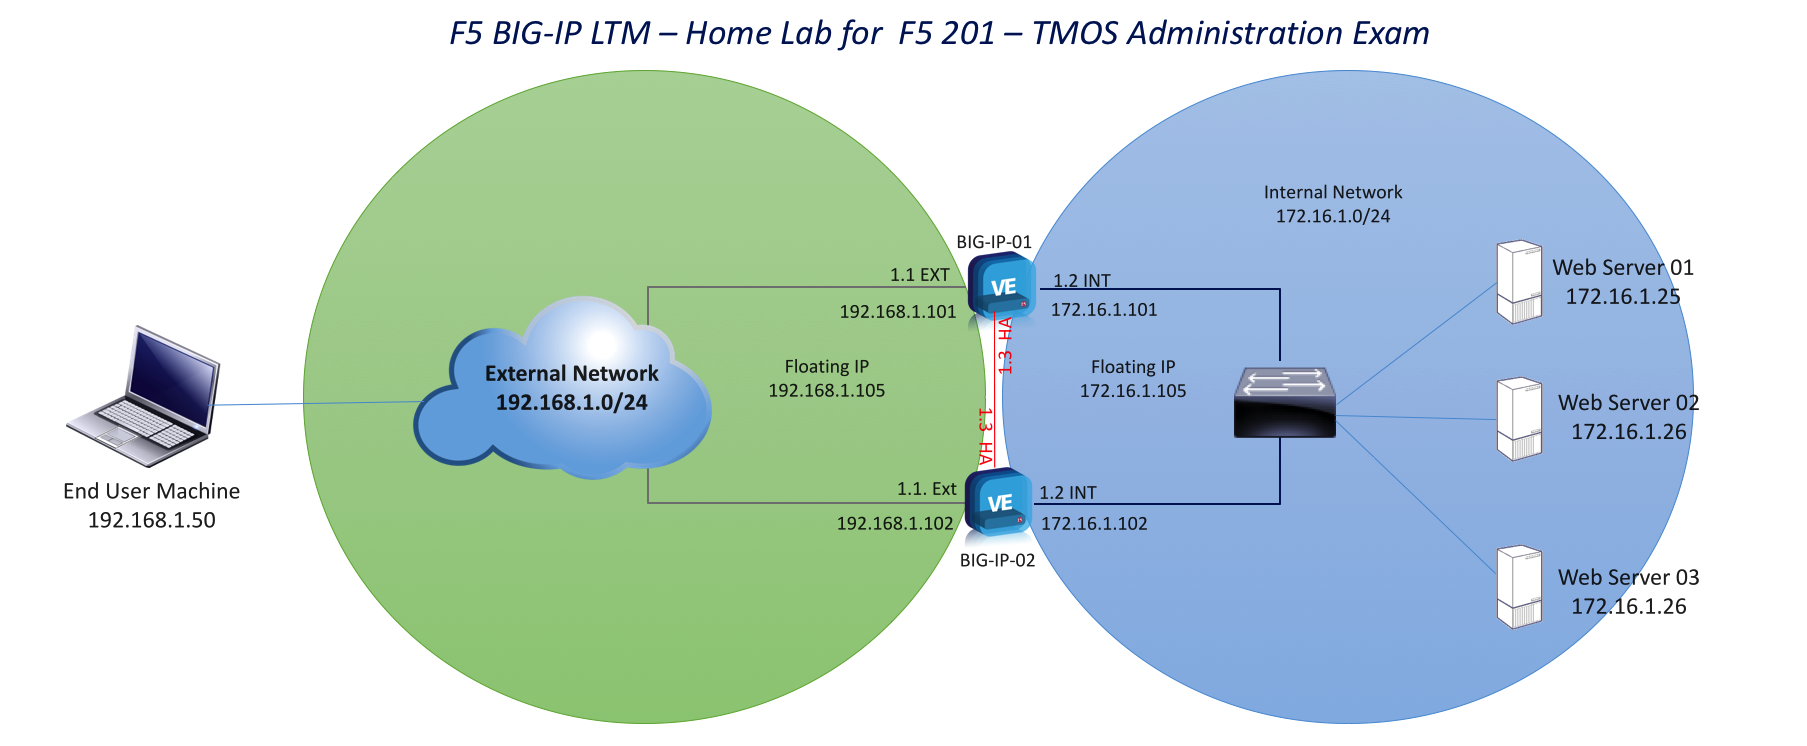
Fig 1 – F5 BIG-IP LTM Toplogy
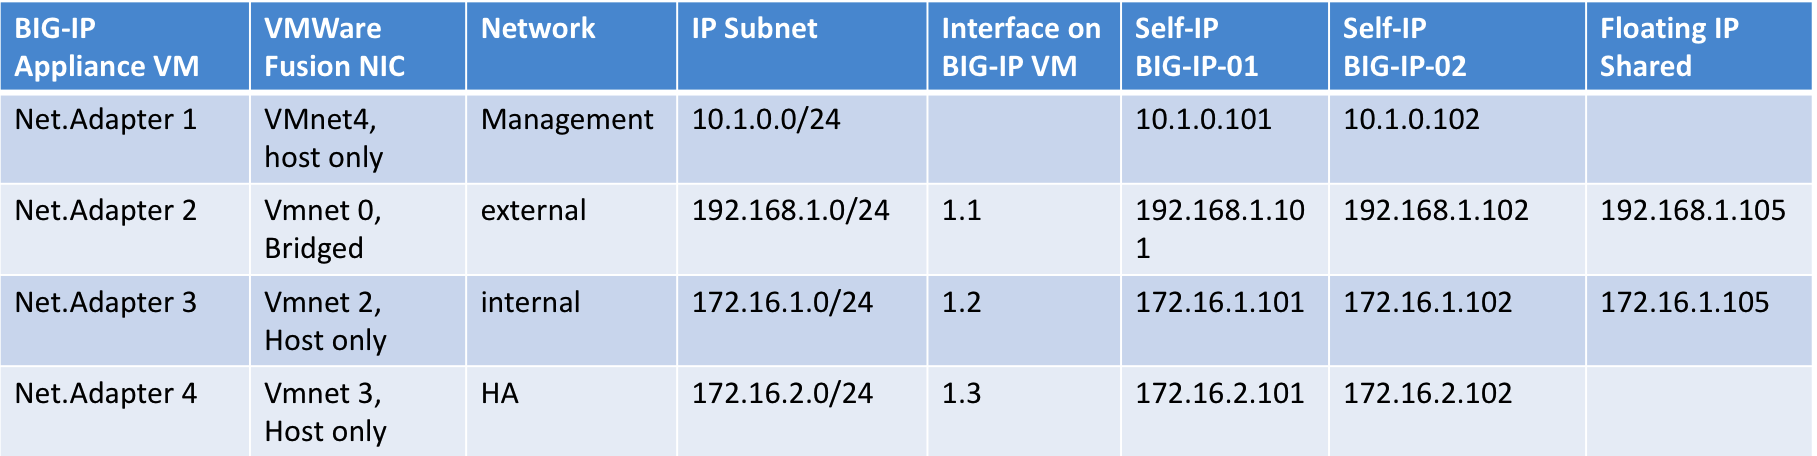
We will be using four VMWare networks for this lab, by default “vmnet” is created so we need to create three more VMware networks.
- vmnet2
- vmnet3
- vmnet4
The IP Address mapping and functions of VMware networks will be as follow:
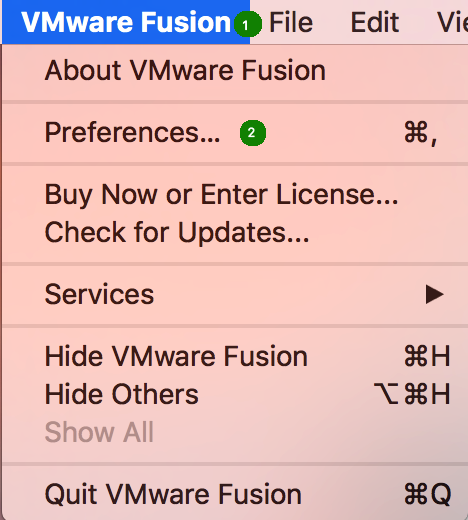
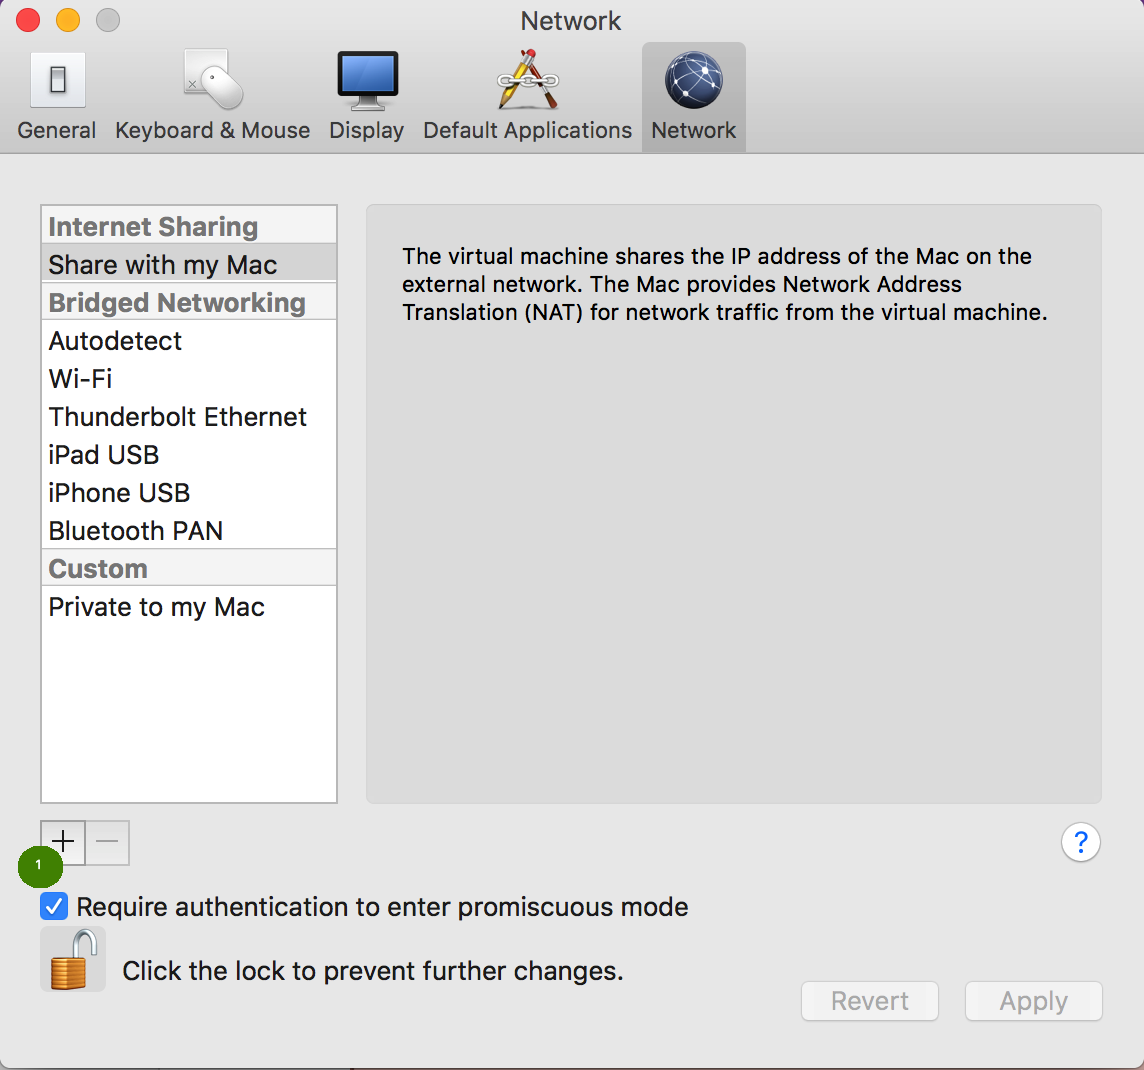
Step 1: Launch VMware fusion and then select preferences
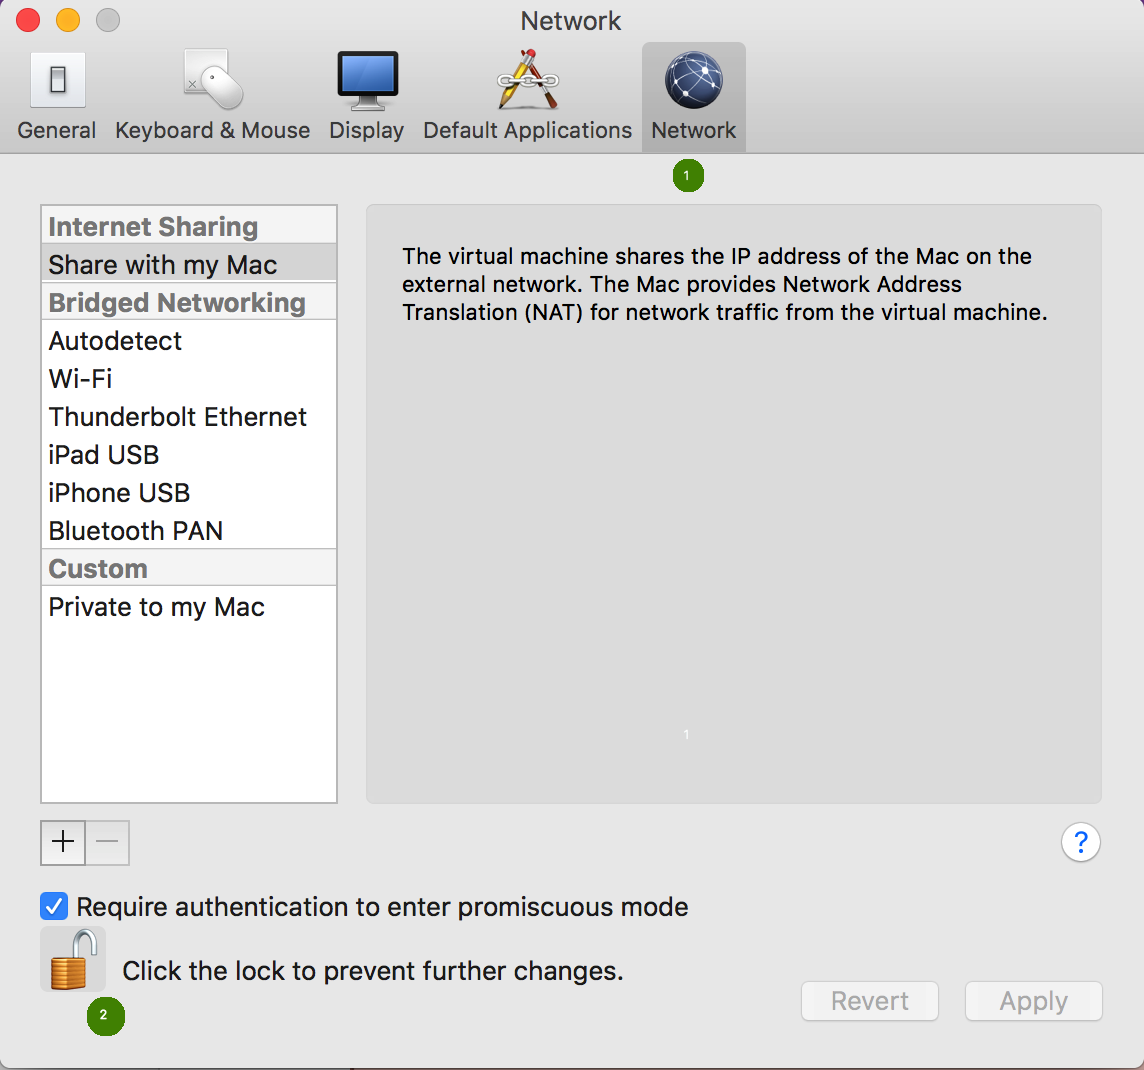
Step 2: Click the Icon Network and click lock icon to make changes
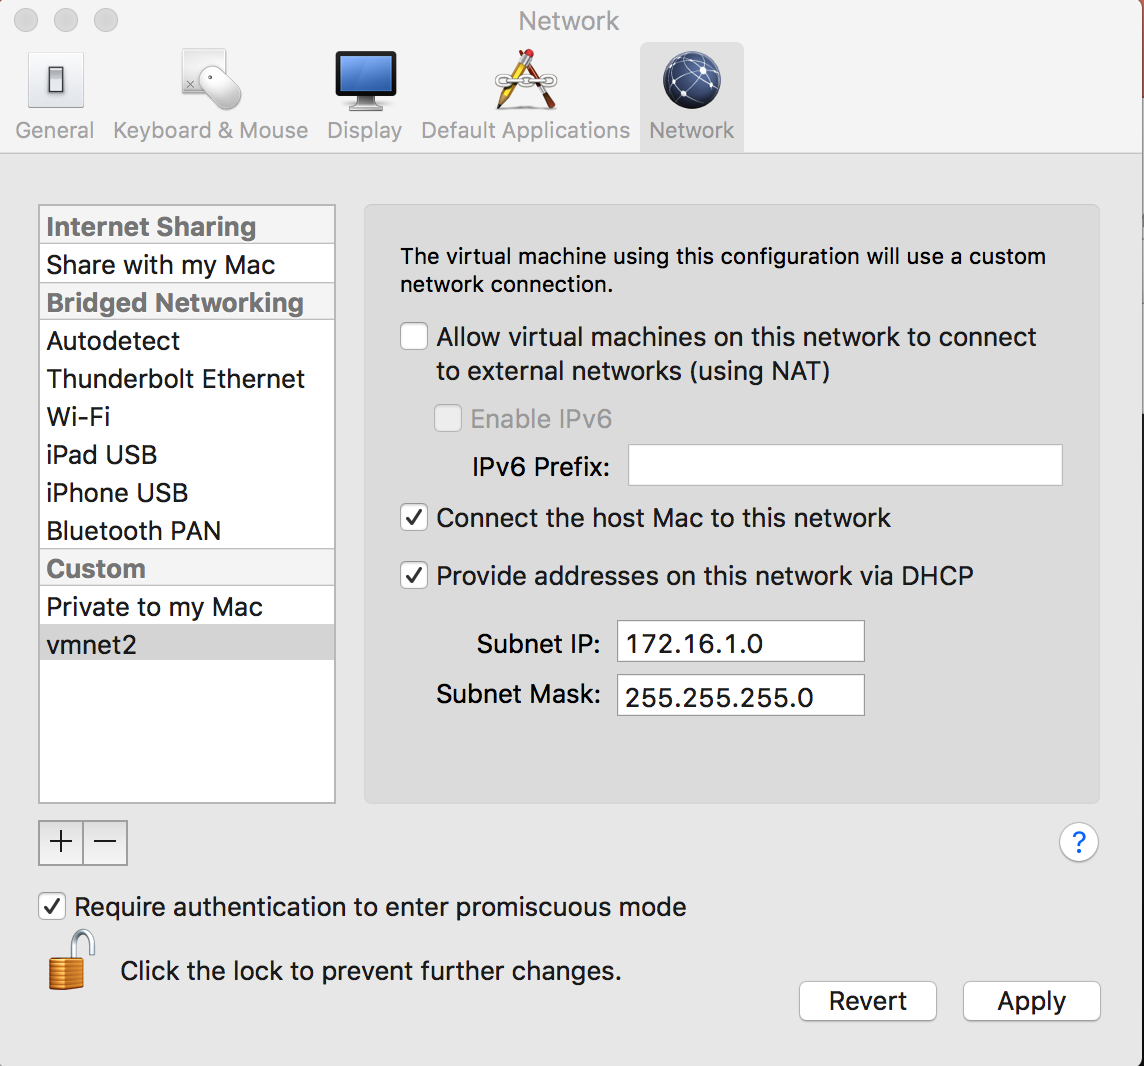
Step 3 : Select + icon to add a custom network named vmnet 2 and assign the Subnet IP 172.16.1.0 and Subnet Mask 255.255.255.0. This will be the internal network. Also ensure to select the following checkbox
- Connect the host Mac to this network
- Provide addresses on this network via DHCP
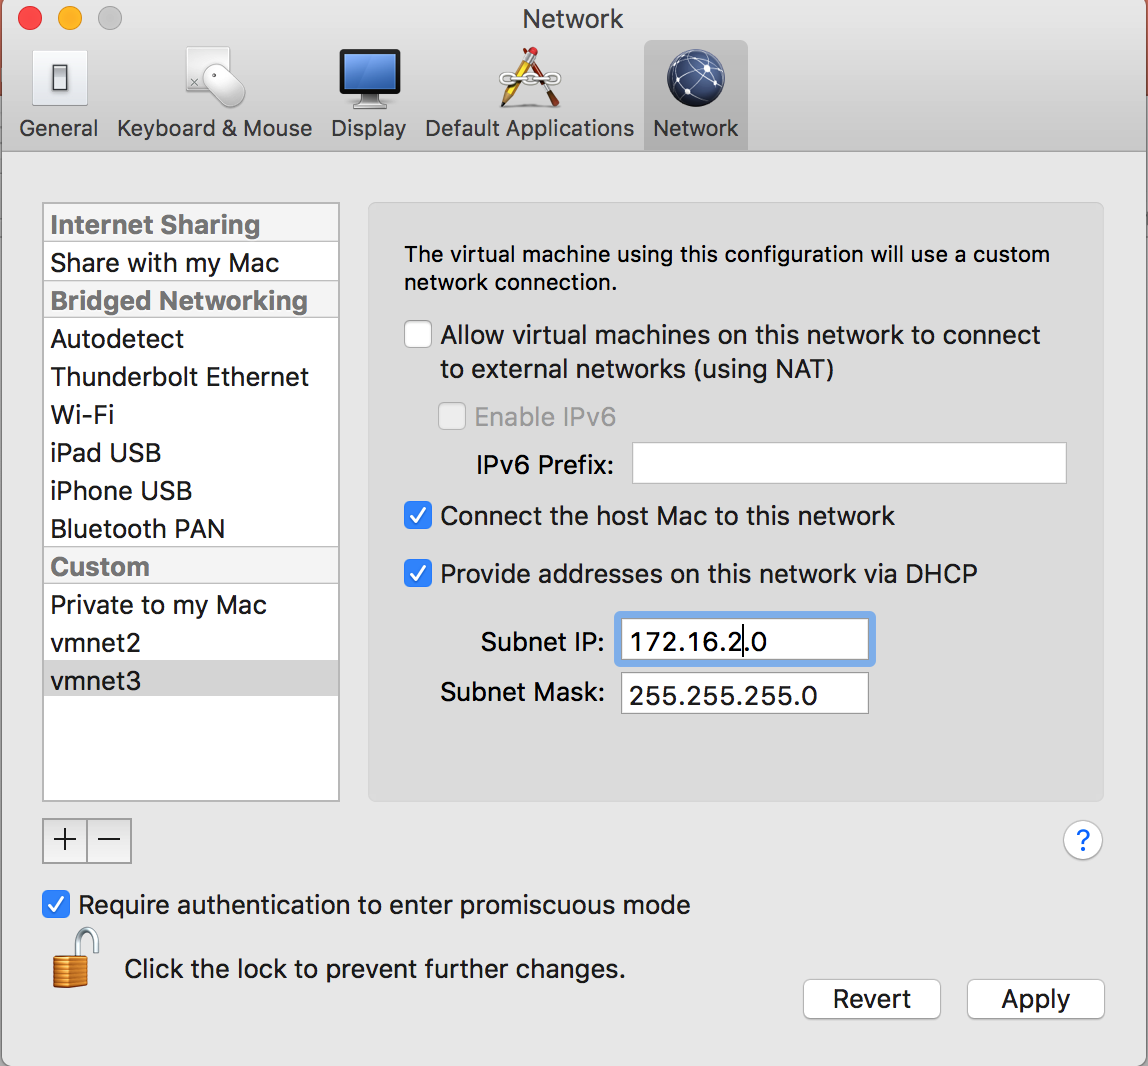
Step 4: Select + icon to add a custom network named vmnet 3 and assign the Subnet IP 172.16.2.0 and Subnet Mask 255.255.255.0. This will be the HA network. Also ensure to select the following checkbox
- Connect the host Mac to this network
- Provide addresses on this network via DHCP
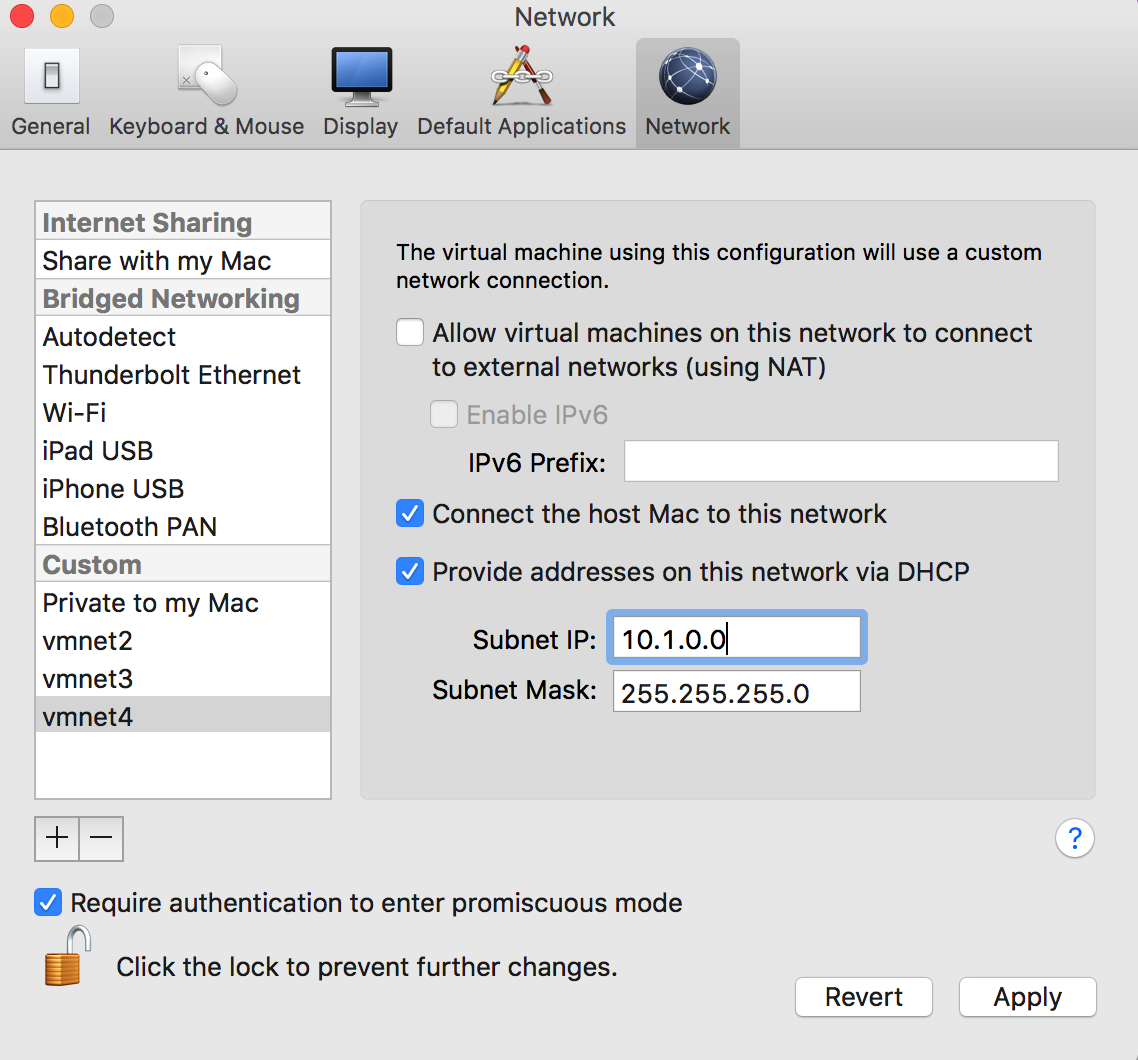
Step 4: Select + icon to add a custom network named vmnet 4 and assign the Subnet IP 10.1.0.0 and Subnet Mask 255.255.255.0. This will be the management network. Also ensure to select the following checkbox
- Connect the host Mac to this network
- Provide addresses on this network via DHCP
Step 5: Log into F5 Website and request a free trail version of BIP-IP virtual edition

Step 6: Once an email is received from F5 with BIG-IP registration key download the BIG-IP VE System VMware Image, since the F5 201 – TMOS Administration Exam is based on TMOS version of 11.4 we will be downloading a BIG -IP V 11.4 – Virtual Edition for our labs. Download an OVA file for VMware ESX/i Server v4.1-5.1 as its compatible with VMware fusion.

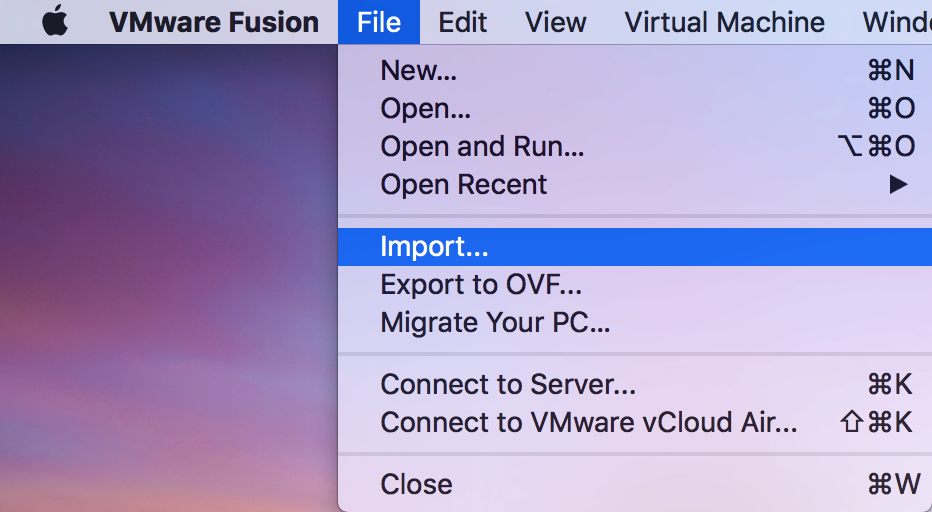
Step 7-a: Import the BIG-IP VE System VMware Image VMware Fusion >File > Import
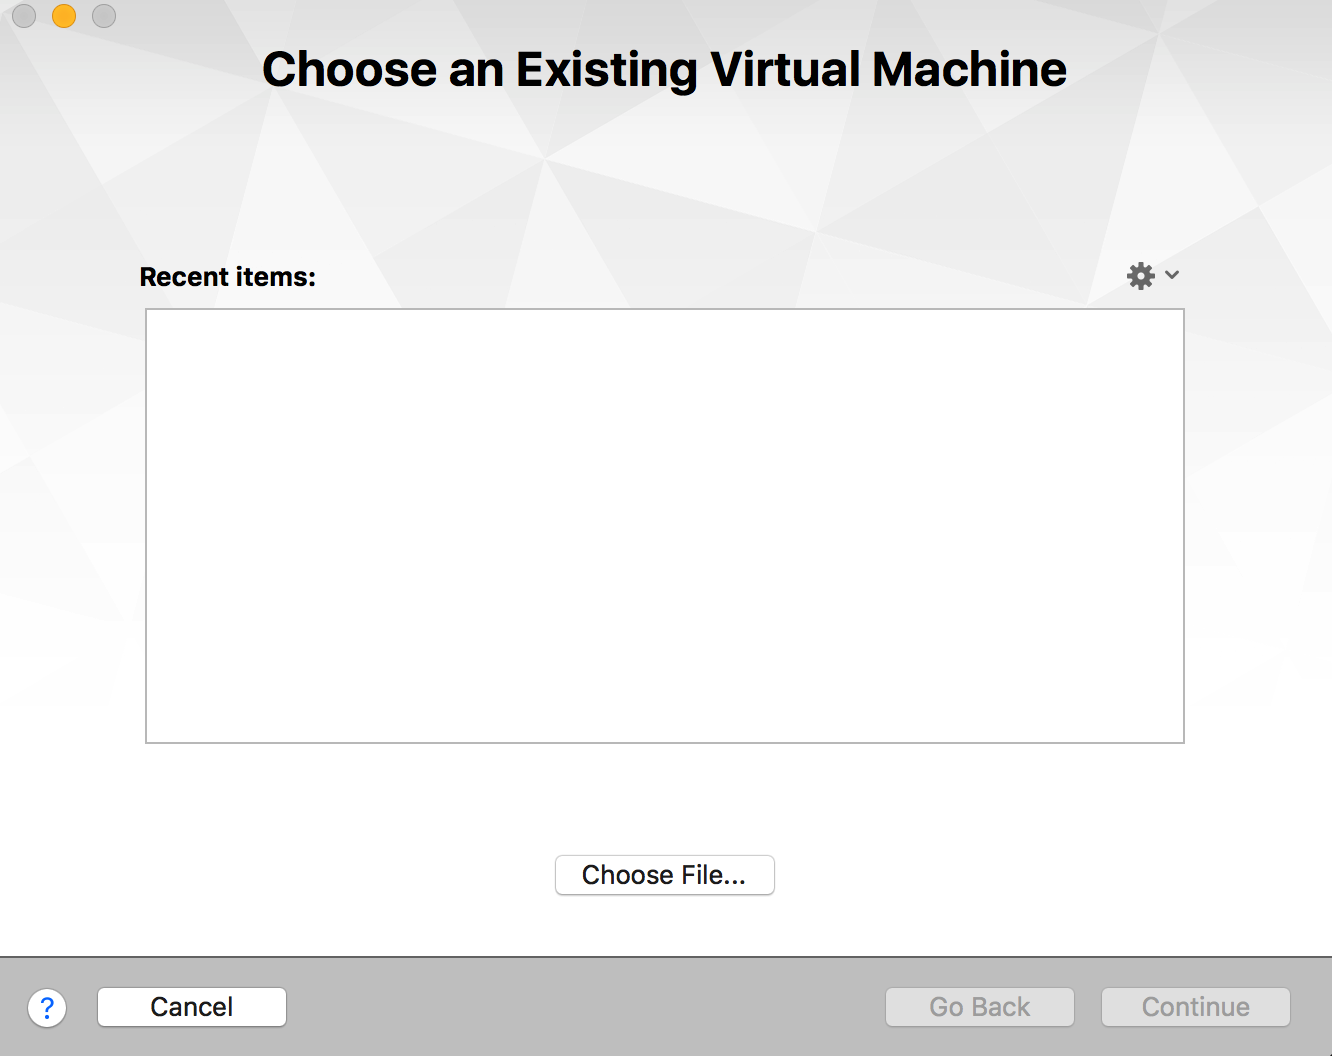
Step 7 – b: Click Choose File
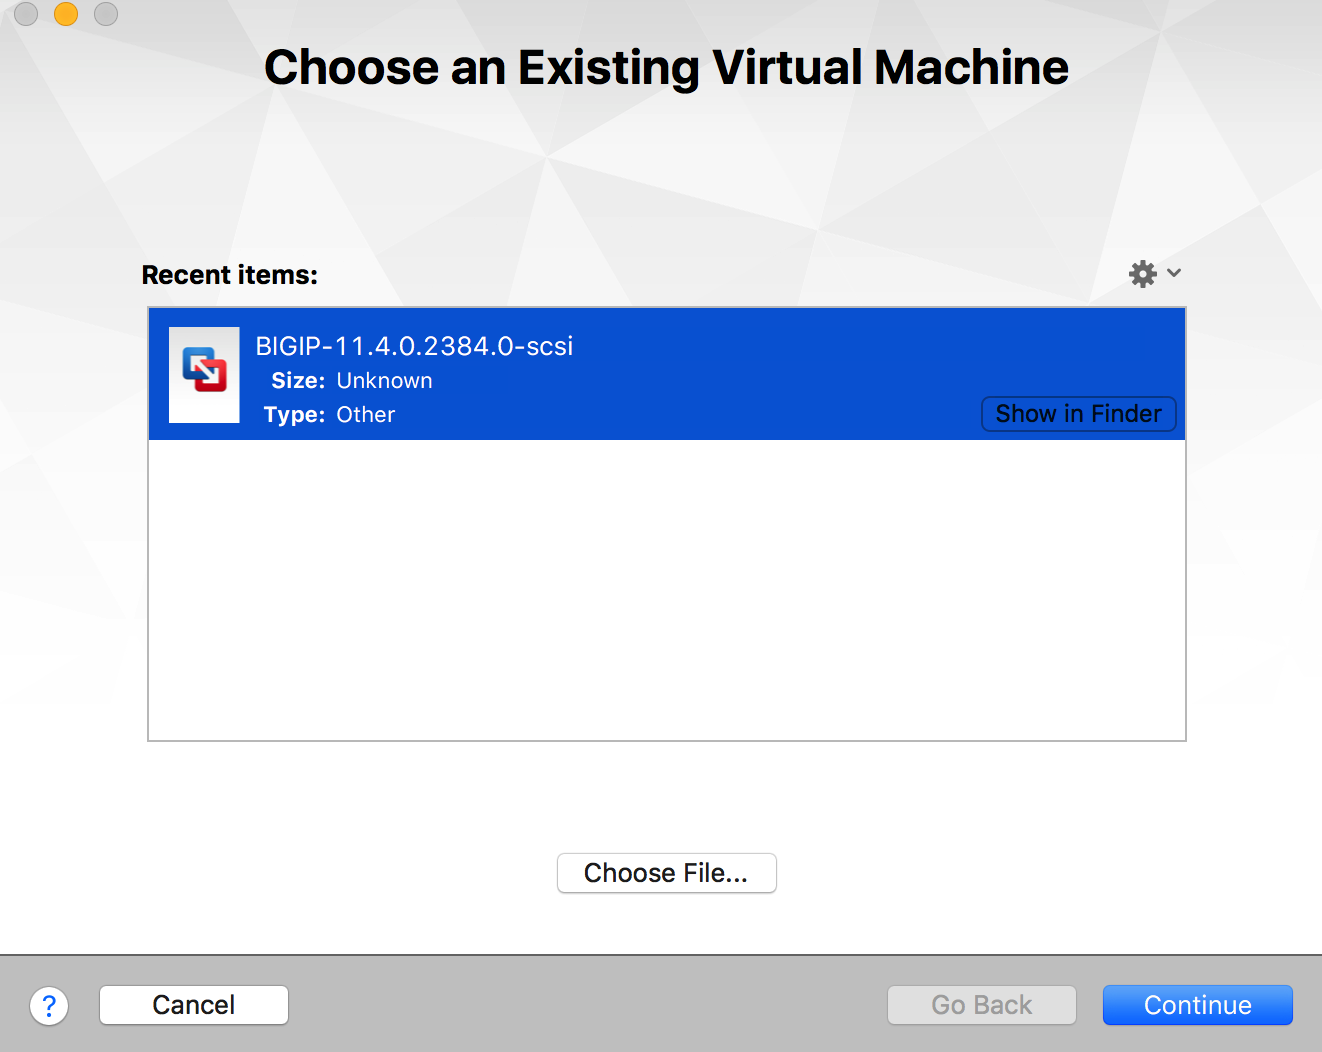
Step 7 – c: Navigate to the folder where the BIG-IP VE System VMware Image was downloaded and select BIGIP-11.4.0.2384.0-scsi.ova image file and then click open
Click Continue to import the BIG-IP VE System VMware Image
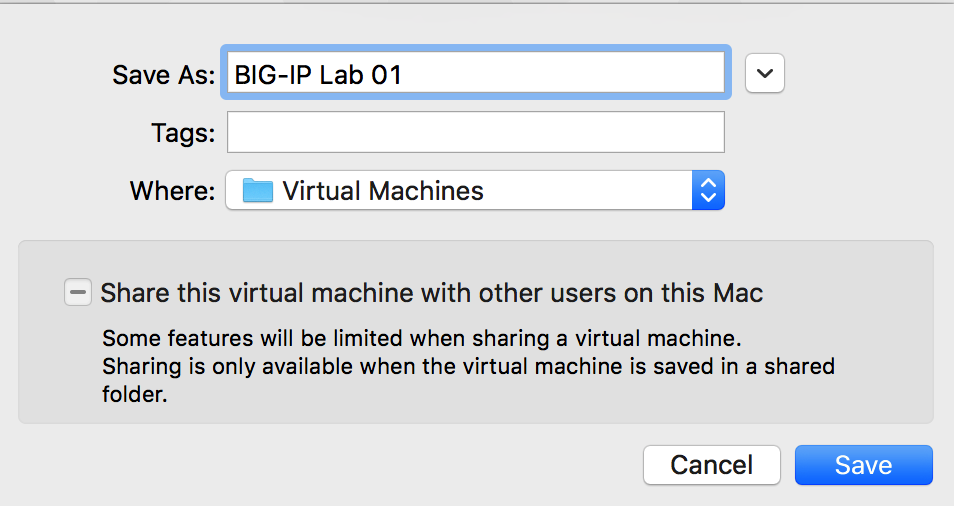
Step 7 – d: Name the new virtual machine with the desired name and then click save
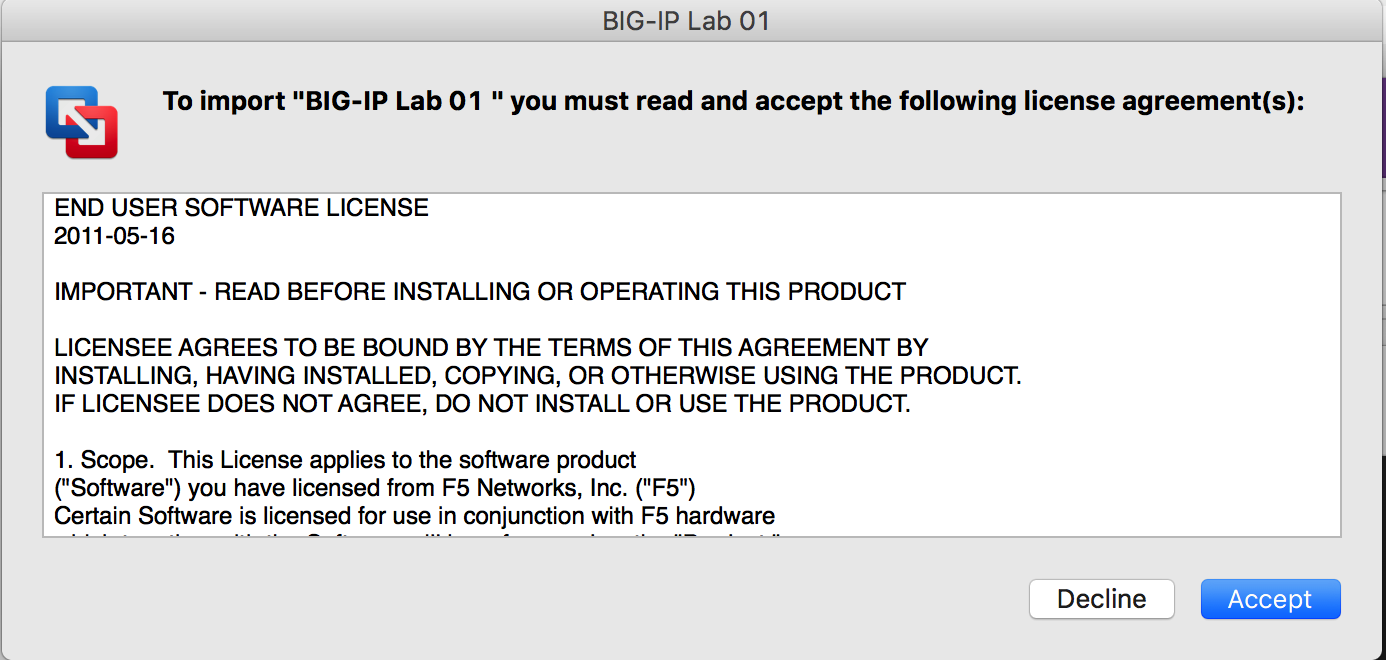
Step 7 – e: Accept the license agreements
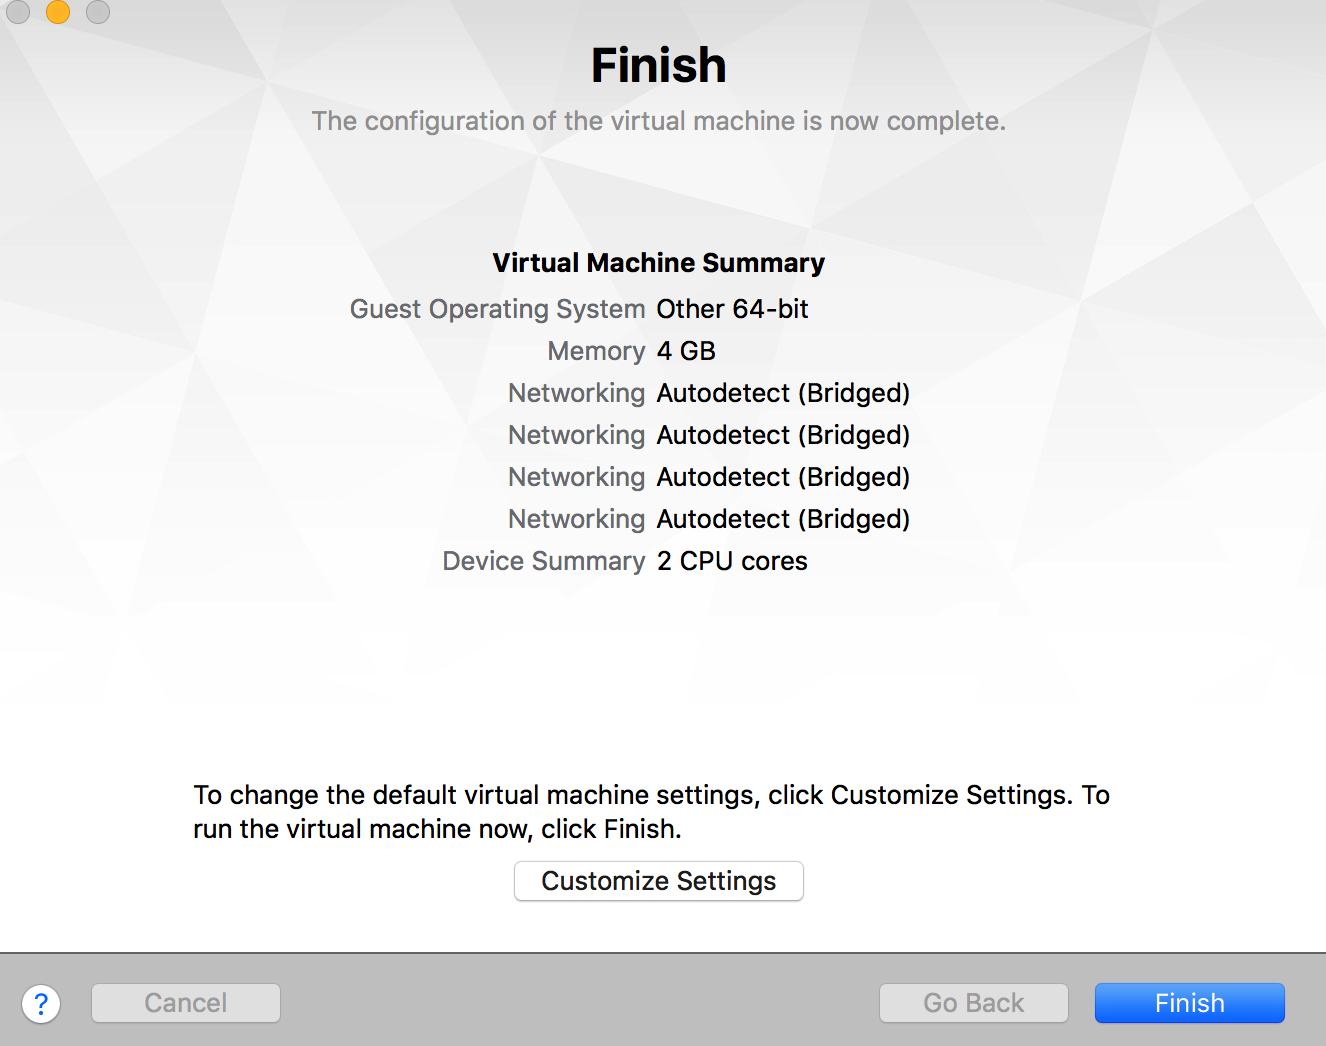
Step 8: Once the import is completed, click finish and then click Customize Settings to configure the Network settings, if needed one can customize memory, CPU and Hard disk settings
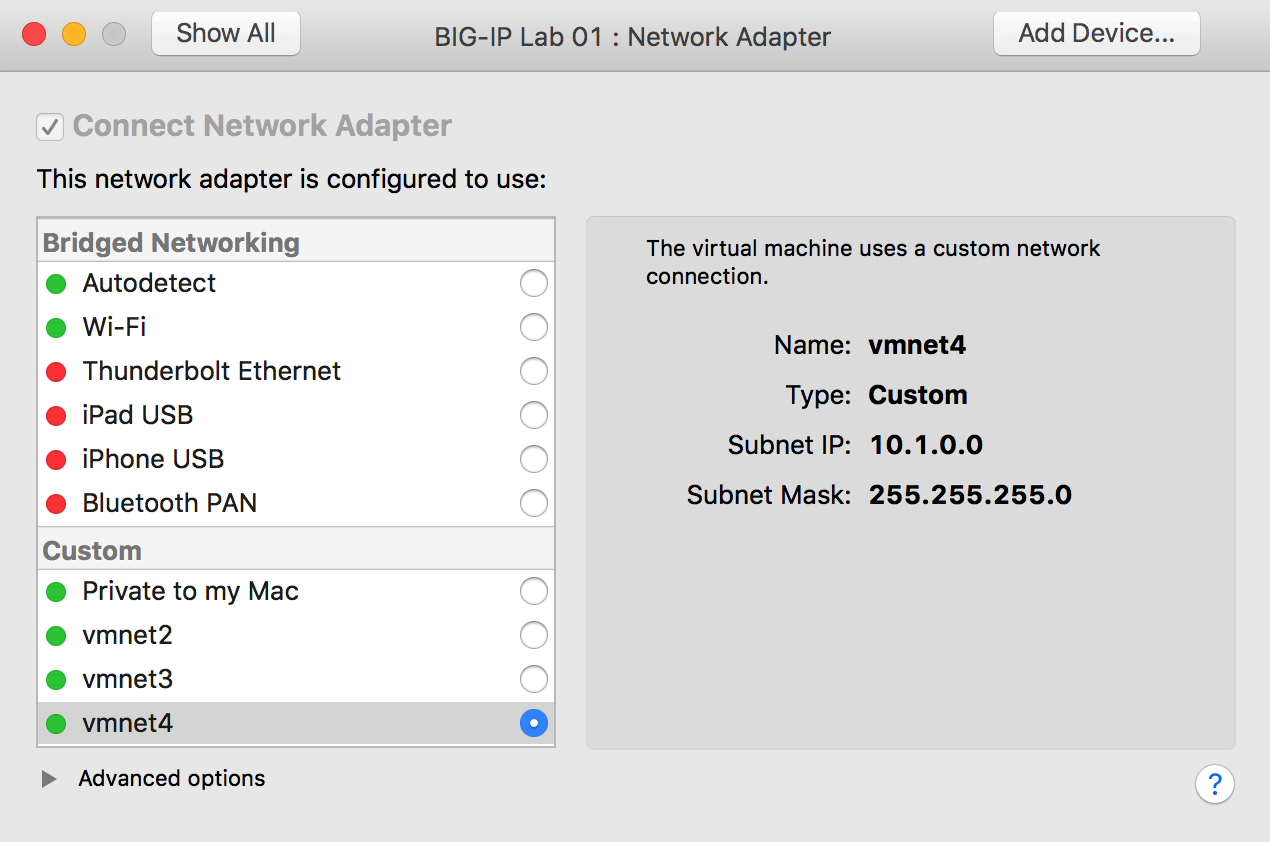
Step 9-a: Customize Network Adapter setting to match the topology you are using.
In our case we will match to our topology
Step 9-b: Map Network Adapter to the vmnet4 network as this will be assigned to the management interface of BIG-IP Virtual Appliance
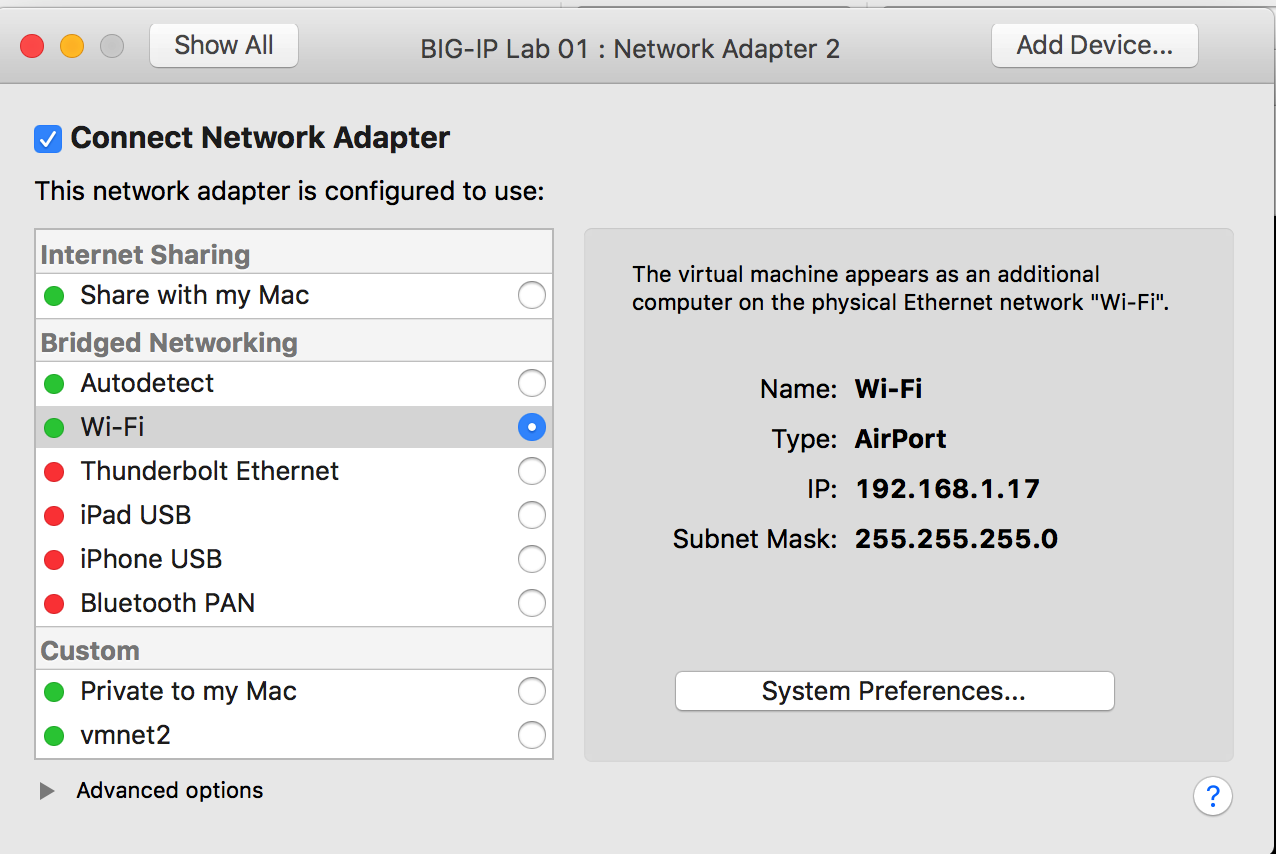
Step 9-c: Map Network Adapter 2 to the Bridge Networking Interface (in our case Network Adapter 2 will be bridged to the Wi-Fi adapter which is connected to the external network 192.168.1.0/24)
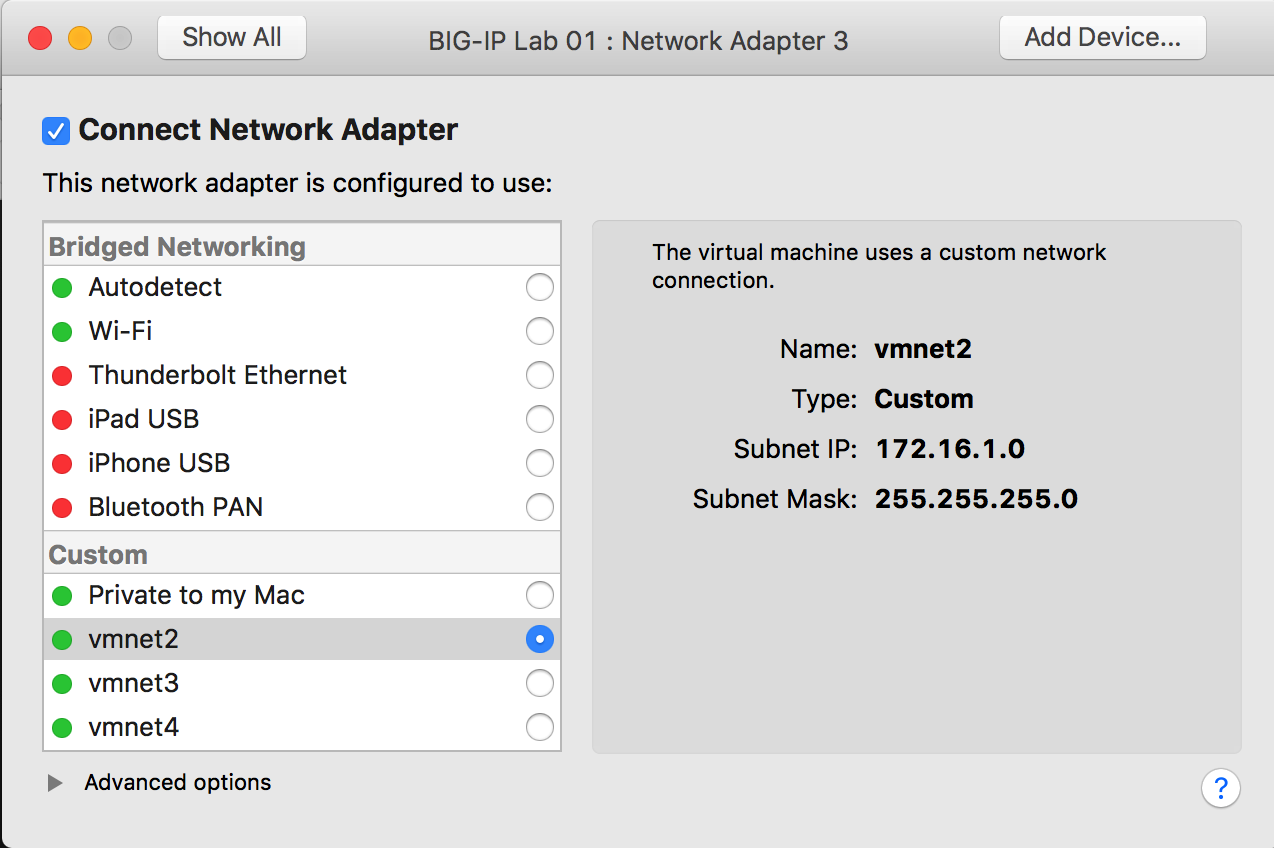
Step 9-d: Map Network Adapter 3 to the vmnet2 network as this will be assigned to the internal interface of BIG-IP Virtual Appliance
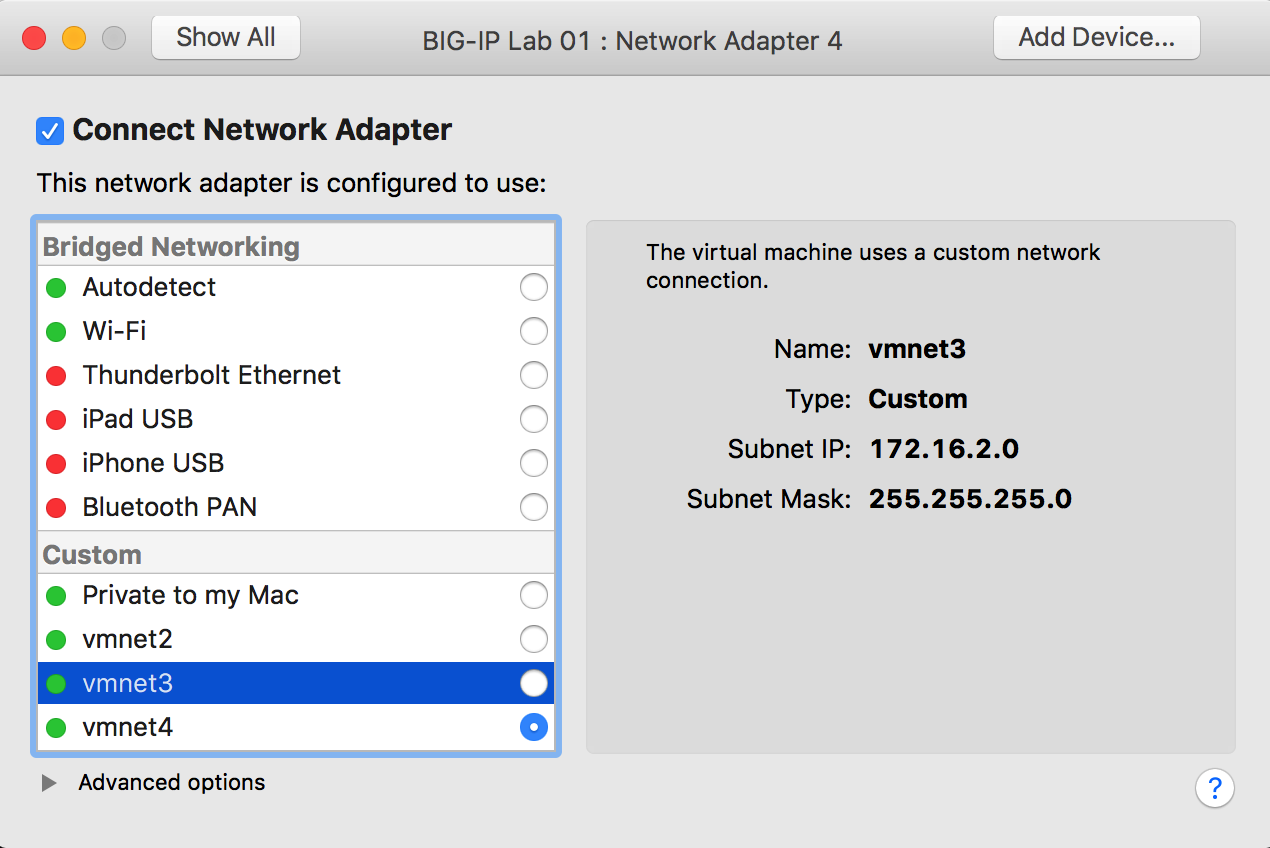
Step 9-e: Map Network Adapter 4 to the vmnet3 network as this will be assigned to the HA l interface of BIG-IP Virtual Appliance
By following above steps one could a build a F5 BIG-IP LTM lab on their laptop using VMware Fusion. In upcoming post we will see how to do an initial configuration on F5 BIG-IP Virtual Edition to run F5 201 – TMOS Administration Exam labs on their laptops.